Building an X11 Colour Picker
One day, I wanted a colour picker on Linux. When I used OS X in the past, I built my own pixel picker to satisfy my needs.
From a colour picker, I really just have one requirement: easily pick the colour of any pixel on the screen.
There were existing tools like gpick and colorpicker, but - in my opinion - both suffered from a critical usability issue: the preview isn’t co-located with the cursor.
This means I have to move the cursor while looking elsewhere at the preview, and it’s not a nice experience for me. 1 This did not spark joy.
Then, I found xcolor.
This had a small preview that followed the cursor, and looked like this:
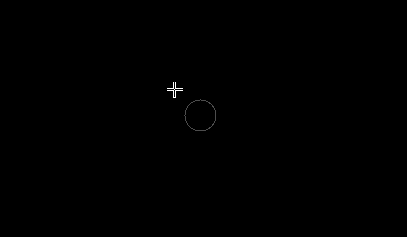 xcolor's original picker
This was closer to what I expected. Though, it did have some limitations:
- the preview only showed a single colour at a time (this made it difficult to know exactly which pixel was selected)
- sometimes the preview would be hard to spot in certain situations (see below picture)
 a preview that is similar to the background and is harder to see
Thus began my journey of improving xcolor.
It’s not a simple soluton
The first thing I tried was improving the preview. I had the following goals:
- increase the size of the preview
- render a grid which made each pixel clearly defined in the preview
- ensure the preview was always clearly visible
After quite a bit of hacking, I extended the pixel data we were grabbing from the screen (more than just a single pixel) to make the preview bigger. As I increased the pixel size though, I noticed some problems.
If the region of pixels we were grabbing included the preview window (remember, the preview window hovers just down and to the right of the cursor) then the pixels would just be completely black. Why?
Well, after a lot of trial and error, I discovered that X11’s XGetImage will return empty data (black) for a ‘drawable’ (or window) that’s obscured by another window (or offscreen). What this meant is that the picker could not be a window and at the same time request pixels underneath it. 2 The size of the preview would be limited by how close it was to the cursor.
This wasn’t the only issue with this approach though, I noticed that as I increased the size of the preview, moving the window would be slower and slower and it lag further behind the cursor.
So, no matter which way I cut it, increasing the size of the preview came at a cost. What could I do?
Thinking outside the box
I was thinking a lot about the fact that I wanted the preview move around with the cursor. I didn’t want it to lag behind the cursor. I didn’t want it next to the cursor either, I wanted it underneath the cursor.
I couldn’t put it underneath the cursor, since those pixels would then be blacked out.
What if I didn’t need to put it underneath the cursor? What if… the preview was the cursor itself?
Nah, surely not. Surely that’s too dodgy and wouldn’t work. SURELY.
Well, let’s give it a shot, if only to prove that this is a bad idea.
Creating the cursor
We’re already using XGetImage to grab a pixel from the screen, it’s trivial to update that to get a rectangle of pixels from the screen.
Now we have that rectangle region of pixels, let’s use XcursorImageCreate to create a custom cursor!
// create a cursor of the desired size
let mut cursor_image = XcursorImageCreate(preview_width, preview_width);

// set the "hot spot" - this is where the pointer actually is inside the image
(*cursor_image).xhot = preview_width / 2;
(*cursor_image).yhot = preview_width / 2;

(*cursor_image).pixels = /* ... code to render the preview ... */

// convert our XcursorImage into a cursor
let cursor_id = XcursorImageLoadCursor(conn.get_raw_dpy(), cursor_image);

// free the XcursorImage
XcursorImageDestroy(cursor_image);

// ... `cursor_id` is used elsewhere to change the cursor ...
And wow, it actually works!
What’s more surprising, is that it’s super fast!!
Here’s what is looks like:
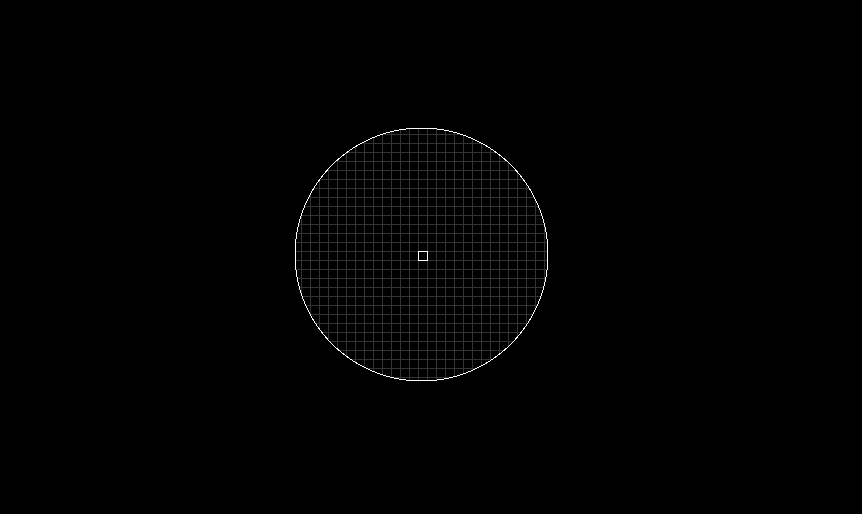 the new picker!
 the new picker again - this time with colours!
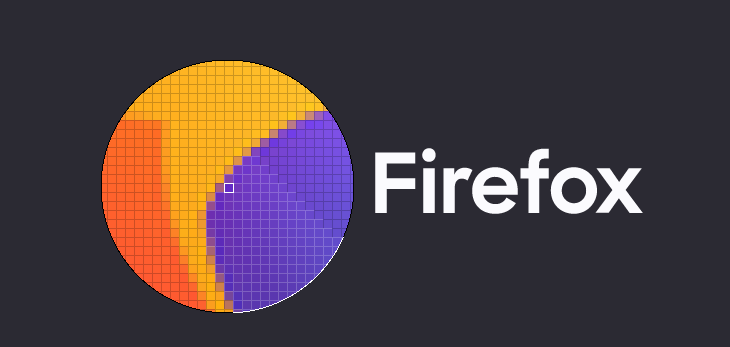
Since we’re in total control of what we’re drawing - it’s just pixels - it was easy to add some configuration options.
For example, the border color of the preview changes depending on the pixels, so it’s a easier to see (rather than blending in with its surroundings).
Here’s what that looks like, as well as zooming it in further:
 the picker, but now magnified so each pixel is much larger
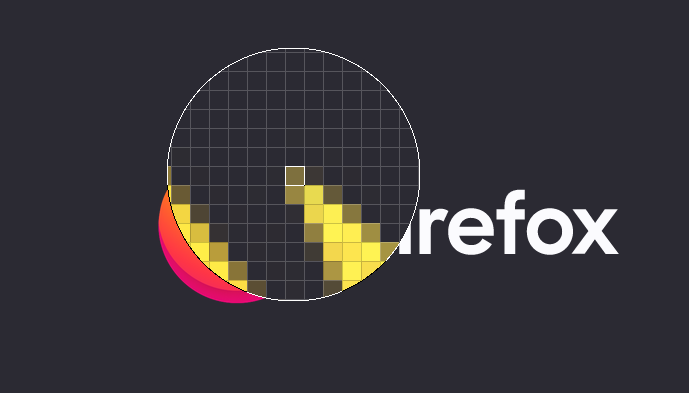
And here’s another example when the preview size is larger:
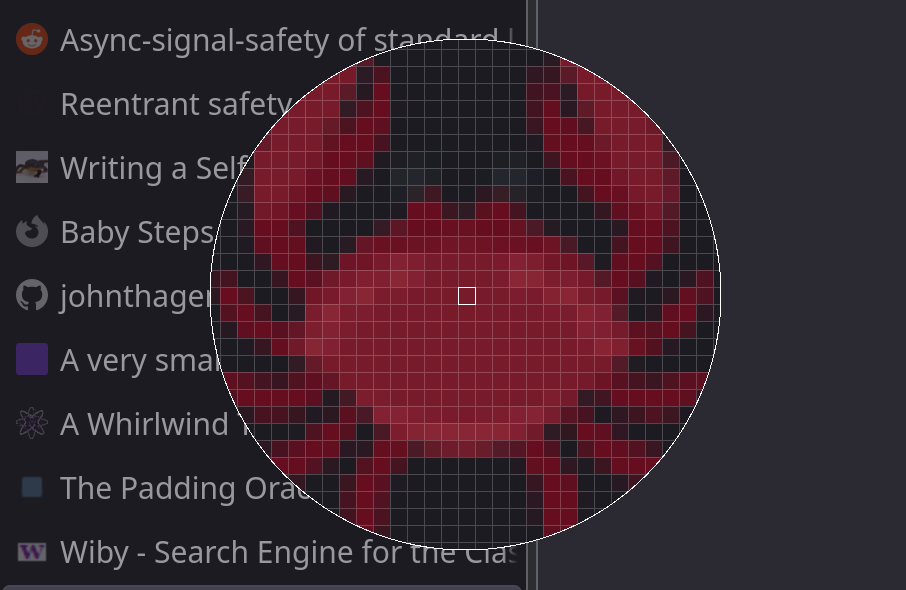 a picker with increased size
What’s really cool about this, is that it moves around the screen extremely fast: as fast as your cursor moves. Because, well, it IS your cursor!
Since it worked so well, I made a Pull Request to xcolor. And the rest is history.
I discovered that there’s a limitation to this approach though: if the cursor size is too large.
I don’t know why it happens, but it seems if the cursor size exceeds
256x256then it begins flickering.You can see my confused investigations over here.
A shout out to Rust
So, the pixel data that XcursorImageCreate provides is an array of pixel values. When drawing the preview (including the grid lines and each pixel) it’s easier to think about things in terms of x and y coordinates, rather than offsets into a flat array.
Rust makes these kinds of abstractions super simple. Here’s a small example:
use std::ops::{Index, Deref};

// represents x and y coordinates
type Point = (usize, usize);

struct SquareView<T> {
  pixels: T,
  width: usize
}

impl<T, U: Deref<Target = [T]>> Index<Point> for SquareView<U> {
    type Output = T;
    fn index(&self, (x, y): Point) -> &Self::Output {
        &self.pixels[x * self.width + y]
    }
}

fn main() {
  let data = vec![
    1, 2, 3,
    4, 5, 6,
    7, 8, 9
  ];
  let sq_view = SquareView { pixels: &data[..], width: 3 };

  // Look at me go! Coordinates instead of indices! :O
  assert_eq!(sq_view[(0, 0)], 1);
  assert_eq!(sq_view[(1, 1)], 5);
  assert_eq!(sq_view[(2, 2)], 9);
}
You can see this abstraction in xcolor over here.
Created: Tuesday, February 19, 2019 at 13:16
Last updated: Sunday, February 11, 2024 at 14:28
-
maybe I’m just uncoordinated, but I don’t enjoy the experience ↩
-
I confirmed this later when I found this discussion in the freedesktop mailing list. Too late for me though, by then I’d spent many hours trying to find out why before I realised that X11 might not even be rendering those pixels in the first place. ↩